Chapter 3 - Inlay

Building an intarsia project is something like laying a tile floor. You start with one part. You add another, and another, and another. The process continues until you are done.

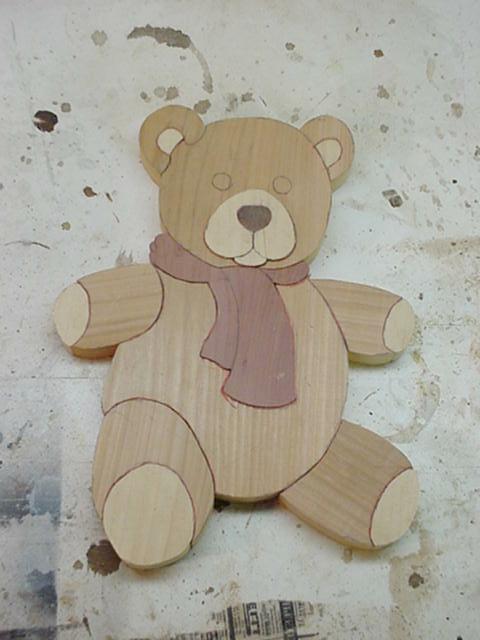
With Teddy, we started with the head/body combo. That’s part number one. Now let’s add a second part, his left arm (his left).

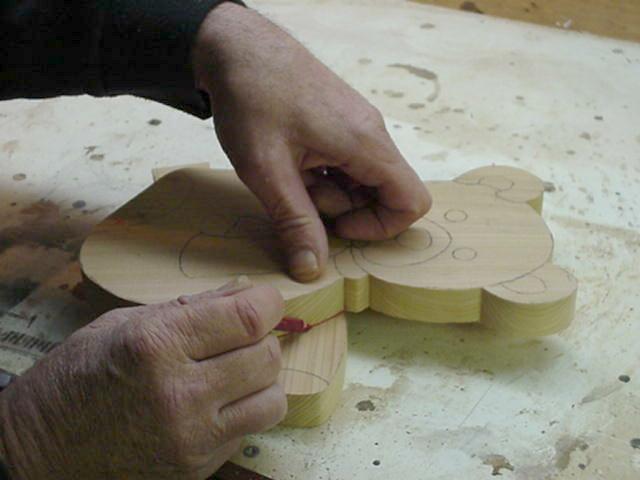
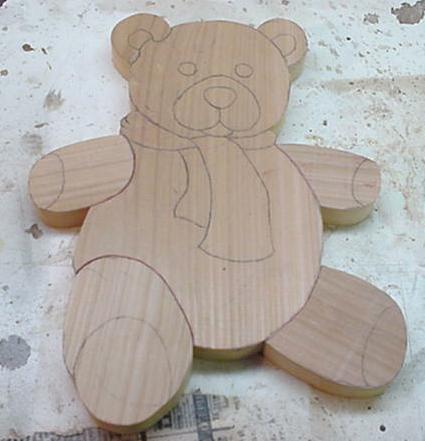
Check the pattern. Notice that Teddy’s left arm (and leg) are away from the viewer – they seem to disappear behind his body. Very well. That’s how we’ll make the inlay, with the body on top.

The pattern for the arm has already been transferred to the wood. Cut out the arm, leaving extra wood at the joint end, the end where the arm joins the body.

Place the body on top of the arm. Position the parts carefully. Using the body as a template, trace a line across the upper arm. This is the inlay line.

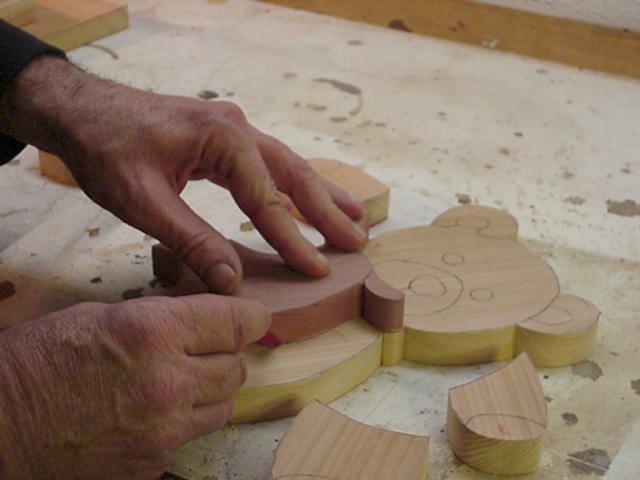
Now to the scrollsaw. Complete Teddy’s left arm joint by sawing carefully along the waste side of the inlay line. If you traced and sawed accurately, the arm will butt tight against the body (see photo below).

Now we have two parts – a body and a left arm. The third part, Teddy’s left leg, also seems to disappear behind his body. So it is treated in exactly the same fashion as the arm. Cut the leg out, leaving extra wood at the hip. Place the body on top of the leg, position the parts carefully and trace the inlay line. Saw carefully on the waste side of the inlay line. Now Teddy has three parts.

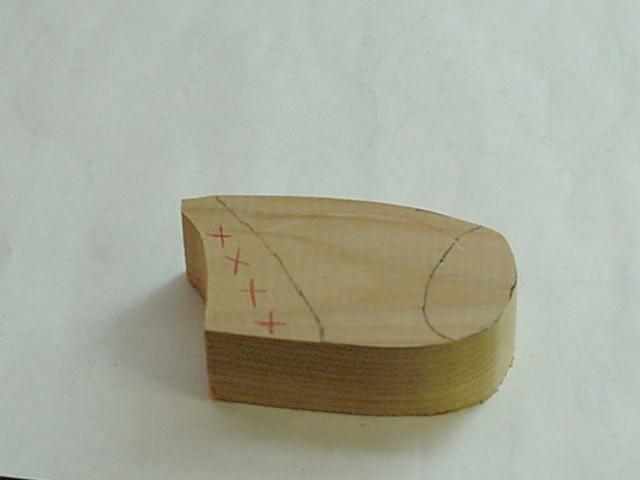
Teddy's left arm. Notice extra wood (xxx) for the joint

Tracing Teddy's left arm joint.

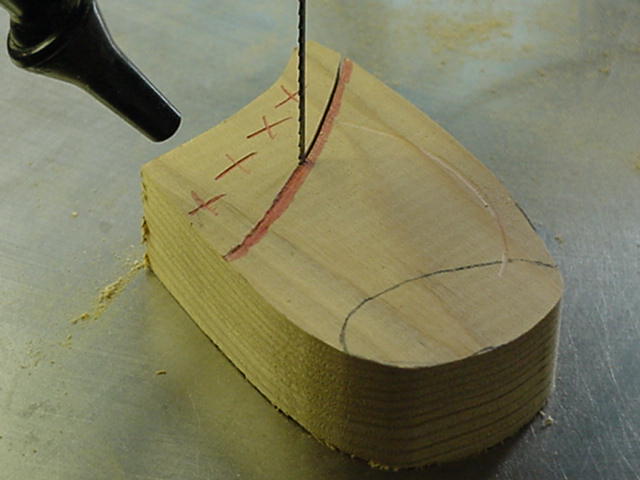
Sawing along the waste (xxx) side of the inlay line (line width exaggerated).

Before we move on, the term "position parts carefully" needs brief explanation. When positioning parts for inlay, you have two references. One is the line layed down by the transfer paper. Use that line to align the parts, then trace right over it in pencil of a contrasting color. I use black transfer paper and red inlay lines. The red and black lines never match perfectly. I saw (of course) on the waste side of the red line.

You can also "position parts carefully" by using the pattern. Position one part on the pattern and place its mating part on top of it. Align by eyeball and trace the inlay line. Both of these positioning methods work. Intarsians often combine them.

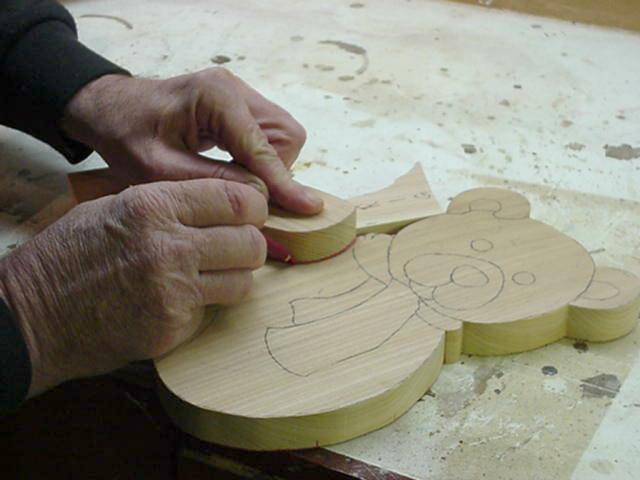
Marking the inlay for Teddy's right arm.

Back to Teddy. Check the pattern. Notice that his right limbs appear to be closer to us – they actually seem to be on top of his body. That’s how we’ll make the inlays, with the limbs on top.

Cut out Teddy’s right arm on the line (no extra wood needed). Position it atop the body, trace the inlay line, and saw carefully on the waste side of the line. Drop the right arm into place. Now Teddy has four parts.

As Teddy grows, you might want to start taping his parts together. Intarsia parts have some sort of reverse magnetism that causes them to scatter and hide when you’re not looking.

The first four inlays. Notice changes in grain direction.

Next comes the right leg. It gets exactly the same treatment as the right arm. Cut it out, position it atop the body, trace, and saw. Now Teddy has five parts.

Do you see what we are doing? We don’t dare cut all of Teddy’s parts separately – with all the freehand errors involved, they’d never fit. Instead we cut the parts one at a time. By using each part as a template to mark its mating part, freehand errors can be reduced to the vanishing point. You can get a very tight fit.

The inlay principle – using one part to mark another – remains constant throughout intarsia. We could build a 200-part eagle, or a string of hand-holding Teddys that goes across the room and out the door, around the corner and down the hall, and still nothing would change. All we would do is place one part atop another and mark the inlay line.

Back to Teddy. We started with his head/body combo, a large central part. Since then we’ve been adding smaller parts to it. This is a typical sequence. But nowhere is this method written in stone – like a tile floor, an intarsia project can begin and end anywhere. As you gain experience, you’ll develop your own preferred method. You’ll look at a pattern and say, "I’ll start with this, put that on top of it," and so on. The entire sequence will unroll before you.

Back to Teddy once more. Outlines of all of his remaining parts have already been transferred to their respective woods. Cut them out one by one in any order you choose. Position each part on Teddy, trace a line around it, and saw the inlay. For now, leave the scarf in a single piece and the muzzle/jaw in another single piece (never cut a board until you have to). That’s all there is to inlaying Teddy.

Tracing the scarf inlay. The scarf is in one piece.

On paper, inlay is simple. If the process seems a bit fuzzy, a practice session with scrap wood, a pencil, and a scrollsaw, will clear it up quickly. The basics are simple enough.

In inlay, as elsewhere in life, the devil is in the details. The challenge lies in the accuracy of your tracing and sawing. Errors in either will cause gaps in the joints. Large gaps indicate poor workmanship.

In quest of tighter joints and easier methods, intarsians (being creative people) have created all sorts of variations on the basic inlay scheme outlined above. Index marks, pinpricks at critical points, tiny scratches, dotted lines, various sawing methods ... the only thing safe to say is that no two us work exactly alike.

What about Teddy’s gaps? How tight should his joints fit? Is there some happy, acceptable medium?

The notion of "acceptable gaps" has been discussed at the Club, with little agreement. A few members insist on perfection. They saw close to the waste side of the inlay line, then finish the cut with oscillating spindle sanders, sanding precisely to the line. They check the fit by holding a light behind the joint. They get beautiful results but limited production. Most of us settle for less than perfection.

How tight should Teddy’s joints fit? When all is said and done, it’s up to you.

All inlays completed.

Go to Chapter 4

Return to Chapter 2

Return to home page