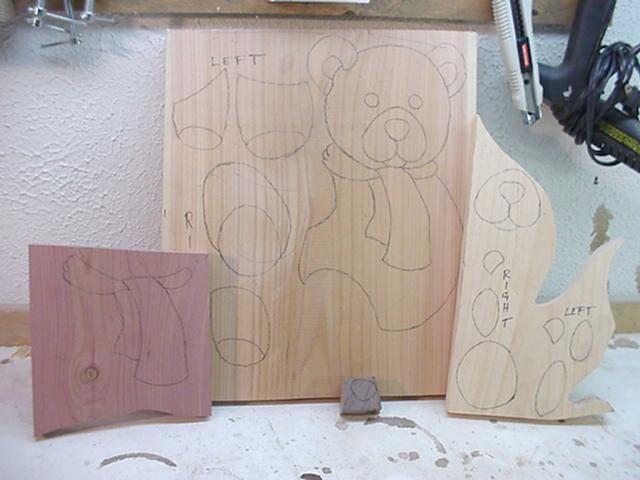
On Teddy, we’ll use pine for Light, western red cedar for Medium and walnut for Dark. We’ll make just one departure. To add color, we’ll make his D (dark) scarf from aromatic cedar.

Tracing the pattern
Chapter 2 - Layout & Sawing
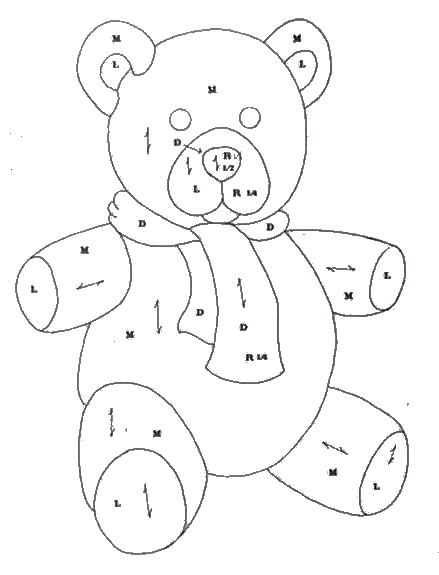
Check the pattern for Teddy. You’ll see three sets of symbols.One set consists of the letters L, M and D. These mean to use Light, Medium, or Dark woods for the parts labelled. Thus an intarsia pattern is something like a paint-by-the-numbers set. More elaborate schemes are used – MD meaning medium dark, for example – but patterns always have explanatory legends. Most patterns come with photographs of the finished piece as well, so if you don’t know how dark D is, you can check.
A second set of symbols consists of arrows. Arrows indicate grain direction.
The third set of symbols begin with the letter R. R means raise. The labelled part is to be raised above the surrounding parts by placing a thin shim or riser behind it. We’ll make risers for Teddy in Chapter 4.
| These symbols are the artist’s way of
telling you how he or she built the piece. They are suggestions – nothing more. At
first you might want to follow the artist’s scheme closely. But as you gain
experience, you’ll find yourself departing more and more – doing what you think
looks good. Thus you develop your own unique style. On Teddy, we’ll use pine for Light, western red cedar for Medium and walnut for Dark. We’ll make just one departure. To add color, we’ll make his D (dark) scarf from aromatic cedar. |
Tracing the pattern |
Before you begin to transfer the pattern, inspect the wood closely. Look for cracks, gouges and other defects. Check the backs of boards, too, so you can work around major flaws.
There are several ways to transfer patterns to wood. The best method for intarsia is to use carbon paper, now called transfer paper. Transfer paper is available in traditional black, which shows up well on light wood and in light colors, to be used on darker woods.
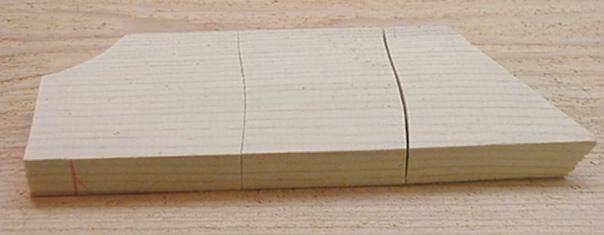
The pattern is transferred to wood by species or color. We’ll do western red cedar (M) first, followed by pine (L) and walnut (D).
| Now, notice on Teddy’s pattern that his head and body are both M. The grain runs the same
direction. Therefore, for now, the head and the body are treated as one part. Place the pattern on the wood with the arrows matching the grain direction. Look through the pattern at the grain. Will Teddy’s head and body look good if sawn from this section? Could you use that tiny knot for a belly button? Slide the pattern around, looking for wood that will make Teddy look good. This is not rocket science – it’s art. You are the artist. |
Entire pattern transferred |
That’s all there is to that.
Remaining M parts are transferred in the same fashion. Then do the L parts (pine), then the D part (walnut). His scarf, as noted, goes on aromatic cedar.
Will you make tracing errors? Yes. What’s more, in just a minute, we’re going to compound them with sawing errors. Does it matter? Within reason, no. If Teddy turns out ¼" fatter than intended ... well, he had a good breakfast. So what? Remember - you are the artist.
Once the pattern is transferred, it’s time to start sawing. Well, almost time.
The chosen tool is a scrollsaw. Many intarsians use bandsaws, which offer certain advantages. But the plain fact is, bandsaws cannot make all of the cuts needed in intarsia. So, if you have just one saw, it must be a scrollsaw.
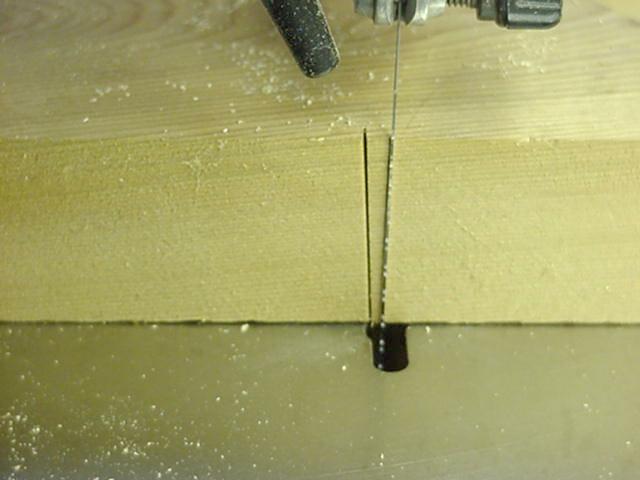
It must also cut square. This is a very important point. In intarsia, the edges of each part must be cut square to the back of the part. If the edges are off-square, the parts won’t butt together flush – you’ll have unsightly gaps in the face of your project. So the edges must be square.
| To square your scrollsaw, saw a kerf in the edge of a 2 X 4. Slide the 2 X 4 around behind the blade. If the saw is square, the back edge of the blade will go into the kerf. If the blade won’t go into the kerf, the saw is off-square by half of the difference. Adjust accordingly. |
The joint on the left in sawn square, the joint on the right is 2 degrees off-square. |
This scrollsaw is 2 degrees off-square. |
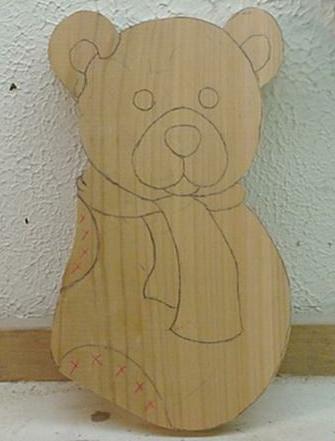
| Now we are ready to saw the first part.
But only the first part. To saw all of Teddy’s parts and have them fit
together like a jigsaw puzzle is not humanly possible. There’s just too many freehand
errors involved. So we start with one part. Other parts will then be made to fit it. It’s best to start with some large central part – in this case, Teddy’s head/body combination. In line with the old woodworking rule that you never cut a board until you have to, cut only the outline. We’ll make the other cuts in the next chapter. It’s also best to leave a little extra wood in the areas where Teddy’s right arm and right leg join his body (see photo at right). The reason for doing this is the topic of the next chapter. |
First cut complete. Notice the extra |